Unleashing AI Creativity: Crafting Cryptids and Dreamscapes
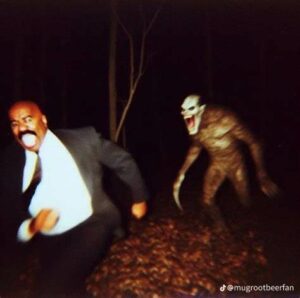
A.I.–Generated Steve Harvey Drowns His Sorrows After Being Chased Through the Forest By a Cryptid
In a world where machines powered by algorithms threaten to take over our creative endeavors, a rebellion is underway, led by an American known as Paranoia. This rebellion, however, takes an unexpected turn as they introduce a strategy that harnesses the very technology they’re fighting against—Artificial Intelligence. In this blog post, we delve into the fascinating realm of AI-powered creativity, where the battle against machines takes an artistic twist.
Cryptid Creations: Unmasking the Unknown
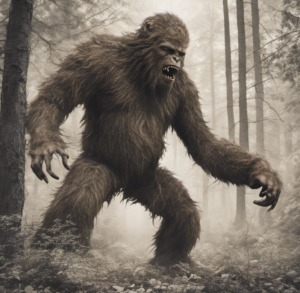
Paranoid American came up with an ingenious idea of using AI to generate visuals of cryptids – mythical creatures whose existence is only speculated but never proven. With the advancement of AI photo generators, this ambitious project now seems within reach. The discussion began with various techniques for creating these elusive cryptid images, including finding the right AI model and manipulating it to bring these fantastical beings to life.
Dream Studio: A Gateway to the Imagination
In their quest to create unique, never-before-seen images, Truth Mafia turns to Dream Studio. Here, they grapple with the challenge of achieving specific coloration and detail, such as a medieval clown adorned with wooden accessories. Text-to-image blending models come to the rescue, enabling the rebels to blend their textual descriptions with AI-generated images. Moreover, anticipation surrounds the upcoming rich text-to-image model that promises even greater control over the creative process.
The Art of AI Versatility
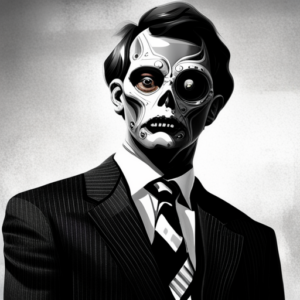
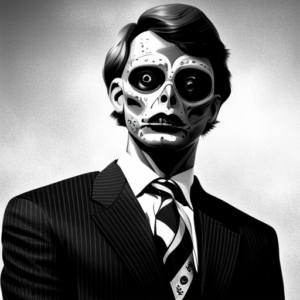
One of the most exciting aspects of this rebellion is the exploration of AI’s versatility in image creation. TruthMafia put the AI model to the test by varying prompts and conditions, leading to the generation of increasingly refined images. These creations span a wide range, from different characters to dragon-like river creatures. It’s discovered that fine-tuning details like seed variables, rendering techniques, and aesthetic styles can wield significant influence over the final result.
Variation
Crafting with Digital Precision
Paranoid American process of creating and refining images is a detailed journey, starting with a rough idea and progressing through the careful selection of appropriate settings and repeated alterations. Within their digital arsenal, users have access to various tabs and tools, allowing them to add, modify, and refine elements, all while collaborating with AI.
The Enigmatic “Pale Black Dragon Eye”
Finally, the conversation takes a fascinating turn as an individual shares their guidance on a specific image modification process. This involves the creation of an image featuring a “pale black dragon eye.” The user deftly adjusts settings within their editing software to achieve the desired result, showcasing the remarkable symbiosis between human creativity and AI’s capabilities.
In this rebellion against the encroachment of algorithms, AI emerges not as a foe but as a powerful ally. It empowers rebels to breathe life into cryptids, dreamscapes, and countless other imaginative creations. As they navigate this brave new world of AI-assisted artistry, the boundaries of creativity are continuously pushed, offering a glimpse into a future where the human imagination knows no bounds.
Summary
➡ The text discusses creating unique, never-seen-before images using Dream Studio. There’s also a discussion about the challenges in achieving specific coloration and detail, such as a medieval clown with wooden accessories, using text-to-image blending models. The upcoming rich text-to-image model that will offer more control is also touched on.
➡ The text primarily explores the use of an AI model to create different images, testing its versatility by varying prompts and conditions. The model can generate increasingly refined images of varying subjects such as different characters and a dragon-like river creature. The fine-tuning of details such as seed variables, rendering, or aesthetic style can significantly influence the final result.
➡ The passage discusses the detailed process of using a digital tool to create and refine images, starting from a rough idea with the help of appropriate settings and repeated alterations. The user can add and modify elements using different tabs and tools within the program.
➡ The conversation details an individual providing guidance and steps to an image modification process that involves creating an image with a “pale black dragon eye.” This involves adjusting settings on their editing software to achieve the desired results. The discussion also touches on the possibilities of future projects and introduces an ad for a comic book called ‘Paranoid American Homunculus Owner’s Manual.’
Transcript
In a world overruled by machines where algorithms dictate your every move. The rebellion begins now. From the ashes of fallen tech, paranoid Americans unveils the knowledge to harness AI. To fight back, to retake our destiny. Join the uprising. Arm yourself with the power of AI. The battle for tomorrow starts today. Welcome to Paranoid programming. Hey, back again. And I’m also with Mark yet again because he had a great idea he had come to me and actually, why don’t you just describe what you just were explaining to me that you were trying to find pictures of cryptids and couldn’t find them.
What’s the deal? Yeah, so I want to talk about some cryptids, and I want to have some visual elements to show on the screen while I’m telling these stories. Otherwise, it’s just me sitting there looking at a screen. So I figured, let me ask Thomas how I could better use these AI photo generators to create something that, for the most part, may have only been seen by one or two people.
There are not photos of these things. We just have descriptions of these first-hand encounters of weird entities and things like that. So, yeah, maybe with your help, we can at least get something close enough so that I could give people a visual aid while telling these stories. And also, this is just a good skill to have moving forward in this digital age to be able to better know how to manipulate the AI.
Because for the most part, I’m just kind of like rolling the dice every time I use the photo generator. And I’ve gotten it down to a pretty good science. Like, I know what keywords to hit, but when it comes to creating a figure, I’ve had a lot of difficulty with that, unless it’s an established character or entity that exists in Photos online already. And for things like Sasquatch or Dogman, those are pretty easy.
Sometimes the AI will give you a Sasquatch to just look stupid, but I’ve made some cool Sasquatch images with AI. So I’m not worried about the more established AI or more established cryptid. We’re curious about what we can create with things like this weird clown sighting or even the Eggman, which is a story that I want to track down so we can get a better description of it.
This brings up a really good point because I’ve run into this before, too, when I was trying to make, like, know, Biden or Reptilian Clinton and all these characters. And a lot of the standard AI models don’t necessarily know what reptilian plus human means because they weren’t necessarily trained on lots of source material. That’s a whole separate thing. But there’s a model called RPG, which I’ll pull down a version of it here.
I don’t know if it’s on-run diffusion. We’re about to find out. But RPG is a stable diffusion model that was trained specifically on fantasy-style artwork and movie frames and 3D renders and stuff. So here’s an example. This is something that would be fairly hard to produce, not impossible, but on a lot of other models, unless they are kind of catering to sort of an RPG zombie, kind of like druid thing.
So anyway, picking a model is a huge part of this. And that’s why the sort of ecosystem for these models is getting bigger and bigger every day. Some people train it specifically on realism, some train it on anime, some train it on more of a blend in between. So I think that would probably take you about 80% of the way there is just finding the right model.
So while we talk, I’m going to launch. This is run diffusion. By the way, paranoid 15, I believe, will get you extra time and a discount and everything. Highly recommend, honestly. This is the one that I use myself, even though I’ve got my own machine built, that I can run it locally. I just prefer running it in the cloud. It’s more convenient and it uses less energy. So I’m going to just go with this automatic 1111.
And I’m just going to do the small hardware. I’m doing everything. Like, if you just signed up for a free account, you would come in here and just hit launch. And I’m going to zoom out a little bit just so I can figure this out. Oh, this is new. This is cool. So I guess they give you like a little thing. It’s going to take 90 seconds to three minutes for this thing to start.
And you can see here session is initializing. So the default one that now loads when you run, run diffusion or almost any stable diffusion. Most people are using what’s called Sdxl, which is kind of like the version gets weird. So there’s stable diffusion. 1. 5 is the one almost everyone has seen at this point. That was the first one that started to look really good. And then stable diffusion came out with another version called 2.
1. And that one was a little bit better because you could sample images in 1. 5 up to 512 by 512, which is okay, but it’s not that big. It’s not even the size of your phone screen, right? So stable diffusion two allowed you to sample images that were 768 by 768. So you get higher resolution. But they also took into consideration a lot of the criticism they got in 1.
5, which was namely they sampled it on a lot of adult images. So that a lot of 1. 5 models are known as like horny because there are so many digital images that they could just feed into the system that had variety to train. It not just what naked people look like, but how blacks on certain things and how subsurface scattering works. So anyways, they took that sample data out of version two, but it suffered because of it.
And people all of a sudden didn’t know what, like, a nipple looked like. So stable diffusion, I guess, three, or what most people call is Sdxl. And as you can see, just as I noticed when this loaded up here on the top left corner, these are the models. These are the checkpoints. Checkpoint and model is kind of interchangeable here. So by default, it loads up run diffusion Excel, which is based on stable diffusion XL.
But you might have better luck with something in 1. 5. So I’m just going to do that first. I’m explaining why I’m doing all that. And they might even have RPG. So if I type RPG here yep, they’ve got I can’t remember pronounced this name, but it’s like Zavia RPG artist tools. So going to pull down what this looks like here. I think I’ve even covered this one on another.
I think when I did my occult Disney intro episode, I used the same one. But as you can see, this one kind of has concepts of this big wolf that she’s riding. And here’s a dragon horse dog thing, but already it kind of can understand. So hopefully this one even has the prompt. Let’s see what yes. So the prompt is and see if I can zoom in. So the prompt for this image was medieval fantasy portrait, armored green skin ORC warrior charging into a battle.
Violent roar, spittle raging angry riding a vicious wolfhog, reddish warg beast. So this one, I think, would be the one that we would want it to start with, but we could also do like an A and B, like, start on a regular model with the prompts that you were trying to give it and then not get the results. And then immediately switch to this one and see what the difference is.
So I’m going to do that. And basically the default model for stable diffusion is this right here. One five. So I’m just going to do one five Pruned. And let’s do an example. So what was one of these cryptids that you were trying to conjure up? All right, so let me see if I could find a good description. Maybe I’ll just tell you hold on a second. Maybe we could just listen to this podcast where they describe it.
I feel like that’d be cheating, listening to a podcast. No pre plug. Now, hold on. Find the article and I’ll read the description because I don’t want to just tell you what I remember, tell you exactly what they said. All right, as we’re doing this, I’m going to change some of these settings. So since we’re not using Excel at first, we might jump to it. It probably shouldn’t be 1024.
So I’m just going to start with something really simple, 512 x 512. That’ll give you the best idea of what the model is capable of doing. And then you can start tweaking the width and the height and the aspect ratio. But for now, I’m just going to leave it 512 x 512 denoising strength. I almost leave it 0. 7, yeah. And then 20 steps. These I get into sometimes.
I’m just going to leave this at normal, just so everything we do is really simple and can be recreated easily. And there’s a bunch of other things in here too. Originally, I thought we were going to do control net. I think I sent that to you. I was like, oh, control net is the thing. But I thought you had, like, images of the cryptids that you wanted to rerender into something else, but really you’re trying to create images that no one’s ever seen before.
Yeah. And I would like to also maybe that’s an entirely separate episode, but I would also like to know that, because that’s something that I’ve come across when I’m using Dream Studio is like, I put an image in there. Because you know how you can give this sample image and rarely ever does it look anything at all like what I put in there or at least even close to what I want.
So I’m not good at that at all. And I’m wondering maybe there’s a better way of doing it through Dream Studio, or maybe there’s just a better it’s going to run diffusion is where you go when you start needing that level of control, I believe. Okay, well, it looks like I am right on the heels of finding a good description for us, so just give me a moment.
All right, I’m going to just start out with something that it probably does know about. So I’m just going to also the easiest possible I’m just going to write the word Bigfoot and nothing else, which is probably not going to be the most ideal because sometimes you want to describe a little bit more than just a single word. But I just want to see what the base stable diffusion one five model thinks Bigfoot is.
And I’m going to change my batch size to four. This is kind of how, like, mid journey works, where you give it a prompt and it gives you four options. That’s the other cool thing about run diffusion is that you can crank this guy up to like, eight and get as many as you want on the first preview. Well, it doesn’t matter. I can blur out if we get some unexpected appendages by just typing in Bigfoot because you never know.
Okay, I got it. Now. I found the article I was trying to reference, but oh, wow. So this is what it thinks Bigfoot is just from the base model. That’s not bad. I mean, it’s slightly human, which is something that some bigfoot experiencers say that not all Bigfoots are completely hairy, and some of them have smooth, human like skin. So what you got here, we will craft it after you describe it, I’ll type in whatever sounds like a loose description first.
All right, let’s see. Nearly 7ft tall and had no neck for his head, appeared to be wedged straight onto his shoulders. He wore a yellow pointed hat which interlocked with the red collar of a tattered green tunic. A round black knob was affixed to the top of his hat and wooden antenna were attached to either side. The face had triangular markings for eyes, a brown square of a nose and motionless yellow lips.
Other round markings were on his paper white face and a fringe of red hair fell down onto his forehead. Wooden slats protruded from his sleeves and from below his white trousers. So it’s like a creepy looking clown wearing some sort of medieval clothing with even wooden sort of accessories. So I would say not all of the details are necessarily necessary. I think what we really want to focus on is like it being taller, maybe thin, having the paper white skin, thin yellow lips, a brown nose and red triangles over its eyes.
I can tell you right off the top, no matter what model we use, it is incredibly difficult to tell stable diffusion what color certain things are unless it’s just like one primary color. Like if you put woman in the red hat, you can probably get there, but it’s going to start making her dress red and it’s going to have a red car in the background. So once we put all these different very specific things in, it’s going to struggle very hard.
For example, medieval clown with wooden accessories that might even be a better launch point. And then you would take it into photoshop or something and then adjust the colors to make them as you need. But there is something that’s right on the horizon. I don’t believe it’s part of rundafusion yet. I haven’t even got it working locally yet. I’ve tried. It’s not easy, but there’s something called expressive text or rich text to image.
So what we’re doing now, we just type this regular text in here. This is known as text to image. Rich text to image is a slightly more specific version of this. Let me see if I can find an example here. So there’s versions of this where yeah, here we go. So look at this first image where it says a pizza with pineapples, pepperonis and mushrooms on top. Now the image on the left was just using regular old text and the image on the right was using rich text.
And that means that see how the font for pineapples is bigger? So it tells it, hey, like pineapples is more important than anything else. And that’s why you see this increase in pineapples. And then see this one on the far right? The word rose, they put in blue. And it’s smart enough to know, like, hey, when you go to render this thing that describes what you think a rose is, also make that blue.
And the same right under it, a nightstand next to the bed with pillows on it. Gray wall bedroom. And see how the pillows text is in the color red, so it knows to infer that that thing is the thing that’s red. But what we’re going to see by just doing regular old like the one on the left again, there’s no red at all, so that’s the big difference.
And that’s where we’re going to lose some of the control. So just for example, I’ve got tall, say tall creature, yellow pointed hat, red collar, green tunic, black knob on top of hat, on top of wooden hat. Oh, wait, no, it was wooden antennas, I believe. Right. The hat was just a normal kind of clown hat with a bob at the end. You’ll be antennae. Right, I think, yeah.
Triangular eyes, brown square nose, yellow lips, paper white face, red hair, wooden sleeves, white trousers. This is going to be an absolute crap show. It’s just going to be pure chaos. But let’s see what comes out of it. And this really would be the perfect example for testing out this rich text to image. Whoa, hold on. Look at this though. Wait, so are you saying that the rich text isn’t completely available yet or something? It’s available, but just to get it to run on your machine, it only works with certain models, and when you do run it, you might get like a python error.
So then you have to open up the python code and maybe comment some stuff around or re change variable names. Right, well, for our purposes, that looks like a waluigi mixed with elf on the shelf up in the right hand corner. Right. So also we didn’t give it any sort of extra insight. If I go back to this RPG one oh, wait, it wasn’t this one, it was Z two.
I forgot what the hell it was called. Zoya, I think. RPG, yeah. Zavia. Let me look at Zavia again. And I just want to see because we’re going to eventually end up using this model to see the difference. So in this kind of a style, which is like a painterly style, let’s just see here. So we’ve got volumetric, lighting, fog, depth, mist, pass, fantasy, stone Castle. Yeah, that sounds good.
So I’m going to plug all that into here. Can you change the Stone castle to trailer in the woods? Yes. Then everything else is great. And then they also are using a bunch of negatives here, so I’m just going to copy what they’ve got and then we’re going to tweak some of them because not all of them are going to be relevant. And then you said you didn’t have a neck, so I just put neck in a negative prompt.
But we don’t need a horse weapon axe club. So this is all stuff that it’s going to basically say, don’t show me this. Right, okay. And it’s funny. He’s got large breasts, cleavage, nude, all in the front of this well. And that’s the problem I run into with the AI photo maker I use now, is sometimes I’ll put description in and I don’t have the ability to do negative prompts, or maybe at least it’s not obvious.
And sometimes it will just say to me, like, you’re not allowed to use this photo, and it doesn’t show me it, and it refunds my credits. And it’s most likely because it’s something pornographic or explicit. Sometimes I’ve noticed on mid journey and other ones, it’ll flash the image it generated like, oh, so quickly. And then it disappears and it’s like, oh, sorry, I can’t show you this. Right? Yeah, it gives you like a split second glimpse at it and then it’s gone.
And that’s happened to me a couple of times where I’m like, oh, that looked really cool. But then I think there’s some copyright thing too, where if it looks too much like a copywritten character like Spiderman, it changes every day too, because for sure I can load up a prompt that worked like a month ago and try it again in mid journey and it won’t let. So this I’m not expecting anything impressive out of the stock model because this is just a model that got released by stability AI who made stable diffusion and just out to the world.
Here it is. It’s what all of the custom models are that really make it special. So here we go. Here’s the four versions. Those are the old ones. There’s the new four. I guess we’re still waiting for it to finish rendering here. There we go. So there’s the four we got. It looks way more like a Veggie Tales episode. Yeah, we got like Veggie Tales Amish Preacher over there and then some dork with rosy red clay buttons on his cheeks.
So the first thing that I’m going to do just to prove, just to highlight something, is that if I scroll down, I’ve got this seed option. So the seed is like the randomized function here. So when it has a negative one in it, it basically means every time I hit generate, come up with a random seed. So you’ll always get a different picture. But if I click this little recycle symbol here, it’s going to take whatever the last randomized seed was and use that.
So just in the effort of time, I’m not going to do this, but if I were to hit generate again right now, you’re going to get four images that are almost identical. They’ll have the tiniest little changes between them, but it’ll be the exact same images. So the reason that I’m going to lock in this one seed is because now when we change to another model, we can see what other models would have done with the exact same everything, the same seed, the same positive, negative prompts, all that.
So I’m just going to jump right into the RPG model, just technically a To Zavia RPG Artist Tools version three, and just hit generate no other changes whatsoever. And we’ll see a pretty dramatic change. And I can already see there’s like a lion or something. This looks like a Frosty the Snowman, maybe on the bottom left. It’s going to turn into, like, a bear. We’re using the RPG model now.
Yeah, this is the RPG model. And again, it’s going to understand more about tall pointed hat, collar, tunic, all these things it gets. And it also understands yellow and red and green and black. But the default model isn’t really smart enough to really make sure that it’s only the pointed hat that’s yellow and it’s only the collar that’s red, and so on and so on. But there’s ways we can get around all of that.
We’ll do this one and then maybe I’ll try one other model just for the hell of it. And then we’ll go back to this one and start really getting it close to what this should be looking like. Okay, so already an improvement. I mean, it doesn’t look like Veggie Tales. These all look like they come out of, like a fantasy illustration book of some kind, right? Yeah. I like the next one after this.
He’s just like Chinese Goat man with his little hat. I do like that one. Yeah, this guy’s cool too. He looks like some kind of Turk huntsman. Maybe like a Tartarian. You put that out on some Tartarian instagram, people be like, oh my gosh, we could just add here, like, old time antique photograph or something, and all of a sudden it starts to blur all of the fake illustrated bits out.
And then you can also I was going to say, how do we make it less animated and more CG? This isn’t an exact science, but usually what you put at the beginning of your prompt will have a little bit more priority and direction than things that are towards the end. I might be totally wrong about that, but that really feels like the way that this works. So I’ll go into the beginning of my prompt and I’m just going to say, antique photograph, realistic creature.
And then down here at the very beginning, I’m going to put in things like illustration painting, fake rendering. Now let’s generate it again and again. We’re using the same exact seed, so it’s going to at least have the same starting point to work with. And these might look a little bit different on the way through. And this model, too, by itself, might just not be as capable of doing realism.
Because if we go through all of the different images they’ve provided here, they all kind of have this painted aesthetic. This one’s a little bit more realistic. But even still, this is definitely not what I would call realism. And they also added detailed, intricate, this eight k HDR cinematic lighting, sharp focus that probably would have a pretty big impact too. So I’ll add that to the back of this.
It looks like we already had that eight K cinematic lighting. What were we missing, though? HDR. Yeah. Going to add HDR here. And if you ever see these little brackets or the parentheses, this is just emphasizing it. So instead of saying masterpiece by itself, when you put it in little brackets, it’s like saying masterpiece plus 10%. And if you put two brackets around it, it’s like saying masterpiece plus 20%.
That’s not the exact math, but that’s kind of how it works. You can even see here where they said large breasts. This is like saying, no, seriously, don’t show any large breasts. So it seems like whoever originally ran this was probably getting a lot of those. So this clearly is still looking animated. If we did an A and B, you’d probably say it’s a little bit more realistic, but it’s still going to have a look to it.
Would it be easier if we use a less ambiguous figure? So what I mean by that is we got basically what we’re shooting for is something that looks basically like a human with some uncanny features. Right. Which will probably be more difficult than maybe making this. Are you going for realism or is like an illustrated look fine? Because that determines what model you go with. Yeah, an illustrated look is fine.
I was also going to suggest that instead of doing the clown thing, which might be easier, it might be easier to find images of that from people who just are weirdos and make clown images and put them on the Internet. But I have another story here in front of me about a white river monster that looks like a giant, pale gray, peeling skin dragon with a horn protruding from its forehead and a spiny backbone ridge.
Could we make maybe something like that with more ease since it’s like less ambiguous? Absolutely. And I don’t think we have to tell it no large breasts or cleavage because it’s a dragon. Who knows? I guess we’ll find out. I’m actually going to take almost all of this out. Yeah, I’m going to take all of it out. Honestly, there’s a lot of woo woo and magic that a lot of people ascribe to these negative prompts, sometimes I use them just to get rid of the things that I see showing up that I don’t want.
I’m also, just for fun, going to change this to my favorite sampling method, which is, oh, wow, they added a bunch of new ones that I don’t even recognize. Hell, let’s just try one of these new ones that I haven’t seen before and see what happens. You can already see a gray dragon. Oh, and I’ve also got it on our old seed. So to reset that back to being random, I can just click on this little die and it just changes it to negative one.
That’s all it does. And that way if I keep hitting generate, I’ll keep getting new ones. Now, can we get it in like, an Arkansas creek? That’s the setting of this cryptid sighting. So we want it to be in a rural sort of Woodsy creek area, and we want it to look maybe like the size of a cow. It’s not described as being that humongous. The way that the scale I would probably approach after we get the main form down.
So once we’ve got the creature down, then we can start telling it like the background and how big it is. Okay, that makes sense. So basically you want to flesh out that the AI knows what it’s creating and then put the other details in. First, you want to pick the model that’s going to be the most accurate to what you’re trying to tell it to make. And then once you lock that in, you could even render that part out and then switch to another model and then paint the background and say, like, turn this into a farm or make this.
So, like, for example, the RPG model might be great at making dragons, but it might suck at making Arkansas. So we’ll give that a shot. I wonder what this is. I put rural Arkansas Creek redneck trailer in the woods, white River Monsters, pilgrey dragon. So I don’t think that the RPG model is going to know about this first. Peeling skin in there, too. Peeling skin? Yeah, because it said it had peeling skin all over it.
Also, what is it called? Molting. When lizards do it right? Do they have, like, a certain name for that skin? Maybe not. I’m just going to do, like, shedding peeling skin. Sheding skin. Molting. We’ll try that again. Oh, look at this out of memory. Is it like we’re trying to cook something that’s overheating the oven or what’s going on? No, that’s just because this is running in the cloud.
Sometimes the computer you get assigned isn’t like the biggest, baddest one out there. Sometimes you get like, the old Volvo that needs a little work. You know what I mean? It’s when you go to rent a car and you go to pick up the car and you thought you were going to get the Avalon, and they’re like, here’s the Corolla, and you’re like, wait, but I paid for the Avalon.
So I just ran it again. And also I noticed at the last second I had this upscale on, so I changed that down to one, which will make these go a lot faster too. Yeah, that one in the bottom left corner, I like, I think that’s a winner right there. Well, pick your favorite because we’re going to bring one of these into the next step, right? Okay. So I like the one in the bottom left corner.
I think that’s the one we should go with just because it kind of nailed the scale in a way. And also the setting looks pretty on point. The dragon could use some work. We’re going to do that. This is just the first step is like figuring out your starting point. So now I’m going to click this little it looks like a little painting icon. And you can see that the tooltip says send image and generation parameters to the Image to Image tab.
If you go up here, we’ve been in this text to Image tab this entire time. So when I click this, it’s going to take that image and it’s going to load it into here. And just like you were saying before with Dream Studio or whatever, you can upload an image and then generate based on that. This is what that is. But this is going to give us so much more control over the process.
So first of all, here’s the dragon that we’ve got in there already. So let’s say I’m going to in paint some of this. So I’m going to click copy image to in paint. And this is going to jump me over to yet another tab right here. And then here is the dragon. And what you’ll notice is that I’ve got this little brush on the screen like we’re in Photoshop almost.
So I’m going to click on this guy to change the size of my brush, make it really big. And I’m going to zoom out a little bit so I can fit it all on the screen. I’m just going to paint, make it just a little bit smaller. I’m just going to do like a really rough painting of the dragon. So I’m just going to cover the dragon up.
This doesn’t have to be perfect because we can tweak this as many times as we want. So there’s the dragon. And now we’ve got all these different options on what we want to do. So the white part now is known as the masked part. We’ve masked that out. So here we’ve got some options in Mask mode. And this In Paint tab basically means I want to paint inside of this image, like take what the image is already and use the colors in it and use everything you know about this image, but change very specific things.
So first of all, I’m going to go to In Paint, not Masked, which means only consider around the outside of this guy and don’t care about the dragon itself. I’m also going to change my model here to, I don’t even know, let’s see. I’m going to do Realistic Vision, which is one of my favorites. This is for realism. And here I’m just going to do rural Arkansas Creek redneck trailer in the woods.
And then I’m going to leave in the Masterpiece best quality, eight k, all that stuff. So I believe that’s all I need. And oh yeah, I’m going to change my batch up to four again just so we’ve got some options. So now when I hit generate. What hopefully we’re going to see is that dragon with something different around it. And I can see that it’s working. So here we go.
So it’s the exact same dragon. The dragon hasn’t changed one bit. This one took trailer a little literally. Like it’s an actual trailer, another trailer like a farm in the background. But this one actually kind of looks like an Arkansas crick a little bit, right? I would say that one’s like yeah, it’s great. The problem I’m noticing though, is the masking kind of left that blank space between the where this is where it gets easier and easier as we go.
Also clear out the in paint. Also I the Masking. You highlighted parts of the water in the creek where now I don’t know what happened to the tail, but I felt like the tail was in front of it. Now the tail is behind it. I don’t know, maybe it’s the same tail, but something up with that tail. So what I’m going to do is I’m going to send this image that was already impainted, right? It started as text to image.
We send it to image to image. Then we impainted the background. Now we’re taking the result of this and sending it back to image to image again. No in paint, no mask, none of that stuff. And what I’m going to do is I’m going to take our original prompt and I’m going to put that in as the prompt again. But now what’s going to happen is it’s going to have this original image as its starting point and a reference.
So now when it tries to generate it, it hopefully is going to be a little bit closer to what we’ve got already. The other thing I’m going to do is I’m going to turn my denoising strength way down. Zero point 75 means only care about a quarter of what you’re being shown. So I want it to stick around closer. I’m going to put it at like 0. 4 just to see what happens.
So now watch that masking area that looks all sloppy that you mentioned. It’s hopefully going to go away a little bit because it’s now redrawing the entire image from scratch. So here’s an example of see now, now there’s still a trailer in the background. We’re still in Arkansas. It still has the general look, but it clearly is like changing ever so slightly between these trees are the same place, and it’s all in the water.
Yeah. So now it’s like I kind of like this one. I don’t know if it’s just me. Yeah, no, I do like that one, too. So then let’s say we stick with this one, right? So we’re going to send this one to image to image. So when I click that, it’s going to replace this one on the left. Bam. Okay. And now we can really start honing in on specific things.
So for example, if I send this to in paint. And maybe I don’t like how his eye is kind of just like a big jumbled mess of pixels, right? Yeah. So I’m just going to click on his eye there, and I’m going to go down here and say in paint only the masked part, right? Not the outside, but just the inside of that. And then I’m going to say in paint area only.
In paint the masked part. Don’t repaint the entire picture. And then up in here, I’m going to type in like dragon eye, realistic dragon eye, eight K sharp, focus, HDR, blah, blah, blah, blah, blah, whatever. So now if I hit generate again, now it’s going to not change the dragon or the outside or any of that at all. And you can see it’s just focusing on that one little bit that I painted in here.
So now if I go, actually, it kind of took his eye away for a lot of these. And what I can do for that, it’s even creepier. It’s almost better without eyes. They don’t mention anything about its facial features. They just say it looks like a dragon. So just to show you if you wanted an eye there and I do like that, it does look creepy. The problem is that I still have my denoising strength all the way down to four.
So this means, like, don’t change it too much. I actually do want to change it quite a bit from not having any eye at all. So I’m going to crank this back to zero point 75. And now when I hit generate again, it’s going to have way more liberty to create something new as opposed to there. Look at that. Holy hell. It went overboard on some of these.
But now we’ve got this huge dragon eye. Yeah. Now if the report said, like, huge red eyes, that would be perfect, but it doesn’t say that. So if we don’t want that, we can just send this guy back to anywhere we want. Maybe say like pale black eyes or something like that. Can you put that in there? Yeah, I didn’t mean to clear it out. So now we’re going to have this one to work with.
Okay. And I’m just going to change this to say pale black eye. That’s it. Wow. I might have to add the dragon back in there because it’s totally trying to put like a person’s face. Yeah, see that isn’t that weird? So maybe the realistic dragon eye works. I’m just going to say pale black eye and try that again. And this is also because of how much we cranked that denoising strength up.
So it’s being like, oh, I can just do whatever the hell I want. I’ve got this thing here a mask content. It’s using the original pixels that are under this mask. So if I wanted it to not know about this big eye that was under there, I can also select latent noise, which will just make a noise pattern, like when your old school TV lost signal and you just got, like, the black and white fuzz.
That’s essentially what it’s going to do now. It’s going to replace that whole eyeball with latent noise so that it doesn’t have this very strong sort of influence. Kind of like pushing it one direction. So now if I hit it again now, the eye is going to have way more flexibility to be something a little bit different. And the fact that it’s still not giving us pale black, exactly what I was mentioning before.
Those little brackets or those little parentheses, I’m going to put pale black in three of them, which roughly is like saying 1. 2 or something like that. Now, the eye is kind of huge. Is that because the masking area is so big compared to the it is. That’s exactly what it is. Yeah. Okay. And I screwed that one up a little bit because to undo it, I would have went back to where he didn’t have eyes and just made a slightly smaller masking area when I told it to make the eye.
Right. And these ones are all still, like, not meshing very well. That’s partly because of this latent noise. It actually is better to usually keep it on original. And if anything, I might just tone this guy down to, like, zero point 55. This is where the time comes in, because now that you’ve got, like, these loans look way better already. Oh, yeah. That bottom right one is I’ve got my eye on him.
There we go. There you go. Yeah. That’s a good dragon. So I need to stop it here just because I’ve got another podcast I got to jump on. But, I mean, hopefully this has been a pretty good introduction to in painting and image to image and to show you, like, this isn’t something that you can do on Dream Studio easily. There’s some sites that let you do in painting, but the amount of control that you’ve got using run diffusion and actually, we did switch models.
Right. So the ability to start from the RPG model to get the dragon and then switch to a realistic model, like realistic vision and then use that for the background RPG was never going to get us this realistic looking background. So that in itself is, I would say, intermediate edging on advanced skill set in order to do this. All right. Well, thanks, Thomas. I appreciate, uh, do you want me to say this out and continue on this for, like, next one or something? We can keep building on this dragon, or do you want to start from something fresh next time? Well, I do need to have some of these photos by Wednesday, so if you have time tomorrow, maybe we can make a couple more.
If not, I’ll do my best to play around with, run diffusion and see what I can cook up, but yeah, just send me that one particular dragon photo, and then yeah, I’ll let you know what’s going on tomorrow. You let me know if you got any time, and maybe we could just create a couple of photos. You got it, man. And don’t forget, Paranoid 15 when you sign up for run, diffusion will get you some extra free time.
Okay, well, cool. All right, well, thanks, brother. I appreciate it. Well, we’ve got plenty of time to play an ad, so here’s an ad. They said it was forbidden. They said it was dangerous. They were right. Introducing the paranoid American Homunculus owner’s manual. Dive into the arcane, into the hidden corners of the occult. This isn’t just a comic. It’s a hidden tome of supernatural power. All original artwork illustrating the groundbreaking research of Juan Ayala, one of the only living homunculogists of our time.
Learn how to summon your own homunculus. An enigma wrapped in the fabric of reality itself. Their power at your fingertips, their existence, your secret. Explore the mysteries of the Aristotelian, the spiritual, the paracelcian, the crowlean homunculus. Ancient knowledge lost to time, now unearthed in this forbidden tale. This comic book holds truths not meant for the light of day. Knowledge that was buried, feared and shunned. Are you ready to uncover the hidden? The paranoid American homunculus owner’s manual.
Not for the faint of heart. Available now from paranoid American. Get your copy@tjojp. com or Paranoidamerican. com today. .

